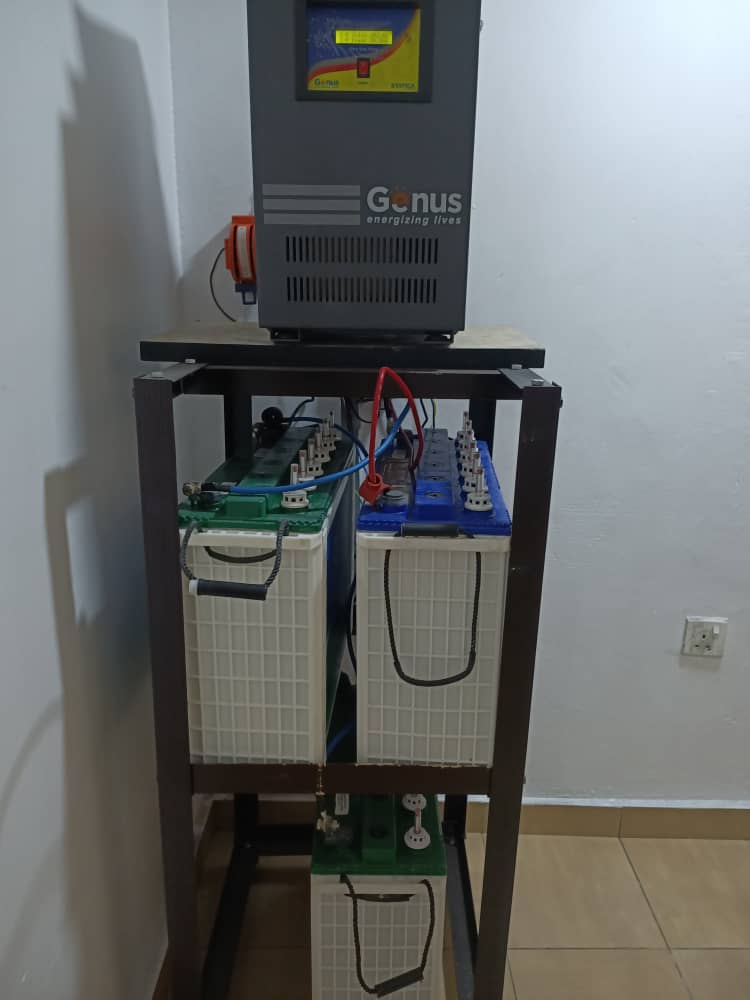
If you are considering Renewable Energy as you means of power supply, then you should be well equipped with all the information about Solar Panels and Inverter Batteries. While information about inverter battery and Solar Panel is important, knowing how to connect your inverter to Battery can save you the cost of hiring a technician to do it. It can also be a means to earn an income connecting inverter to batteries for people who require this service.
In this comprehensive guide, we will be revealing the simple way to connect your inverter to battery. Follow us as we explore the world of renewable energy.
How To Connect Inverter to Battery
Before you can connect your inverter to battery, you should be well aware of the components that make up the inverter and battery. Below are information on inverter and battery as well as steps to connect your inverter to battery.
Understanding the Components
Before initiating the connection process, it’s crucial to comprehend the primary components involved. An inverter serves as the bridge between the battery and your electrical devices, converting DC power from the battery into AC power usable by household appliances. Selecting the right type of battery for your inverter, such as deep-cycle or AGM batteries, is pivotal for optimal performance.
Preparation and Safety Measures
Begin by gathering the necessary tools and materials, including cables, a screwdriver, and safety gear like gloves and goggles. Safety should always remain a top priority during the setup process. Ensure the area is well-ventilated, avoid sparks or flames near the battery, and work in a dry environment to prevent electrical hazards.
Step-by-Step Guide to Connect Inverter to Battery
- Check Battery Condition: Before connecting, inspect the battery for any damages or leaks. Ensure it’s fully charged to prevent complications during the setup.
- Connect Cables Correctly: Follow the manufacturer’s instructions for connecting the cables. Typically, red denotes positive (+) and black signifies negative (-). Securely fasten the connections to prevent any loose wiring.
- Test the Setup: After connecting the inverter to the battery, test the setup by turning on a small appliance. Verify if the inverter powers the appliance as expected. If there are any issues, recheck the connections and consult the manual for troubleshooting.
Recommended: How To Choose The Right Inverter
Troubleshooting Common Issues
Sometimes, despite careful setup, issues may arise. Common problems include loose connections, insufficient battery charge, or a faulty inverter. Troubleshoot these problems systematically by double-checking the connections, charging the battery adequately, or seeking professional assistance if needed.
Best Practices for Maintenance
Regular maintenance is crucial for the longevity of your inverter-battery setup. Inspect the connections periodically, clean terminals, and protect the system from extreme temperatures or moisture. Following these practices will ensure a consistent and reliable power supply.
FAQs
1. Can I connect multiple batteries to one inverter?
Yes, multiple batteries can be connected in series or parallel to increase the storage capacity and voltage.
2. What size inverter do I need for my appliances?
Calculate the power requirements of your appliances (in watts) to determine the appropriate size of the inverter.
3. Can I connect an inverter to a car battery?
It’s possible, but it’s crucial to ensure the inverter’s power rating matches the capacity of the car battery to avoid overloading.
4. How long do inverters typically last?
The lifespan of an inverter varies but proper maintenance can extend its longevity, usually lasting between 10-15 years.
5. What safety precautions should I take when connecting an inverter to a battery?
Wear protective gear, work in a well-ventilated area, avoid sparks or flames, and carefully follow the manufacturer’s instructions.
Conclusion
Connecting an inverter to a battery isn’t just about linking cables; it’s about ensuring a secure and uninterrupted power supply. By following these steps, one can create a dependable setup that serves various purposes, from providing emergency power during outages to supporting off-grid living.

